Saturday, May 1, 2021

Spoil Me Soap Series

Months ago my cousin, Cory, and I were talking about different types of soaps.  I honestly don't remember how we started on the Spoil Me Soap series but over the next couple of weeks we bounced ideas off of each other and the following soap sets are the results. 

The Spoil Me Soap Sets consists of three bars.  Both sets will have the Spoil Me - Detox Soap and the Spoil Me - Scrubby Soap.  The Spoil Me - Detox Soap has activated charcoal, eucalyptus essential oil and rosemary essential oil.  Ingredients that are detoxifying and cleansing.  The Spoil Me - Scrubby Soap has luffa, birch essential oil and bergamot essential oil.  The luffa will help exfoliate dry skin and the birch/bergamot blend is sweet and refreshing. 

The difference in the two sets are the Spoil Me - Luxuriously Soaps.  There are two options.  One is scented with sandalwood essential oil, the other has jasmine essential oil.  They both have heavy whipping cream, buttermilk and coconut milk to create a rich, conditioning lather.


The soaps in each set can be used everyday or you may want to alternate the Detox and Scrubby Soaps and use once or twice a week and use the Luxuriously Soap every day. 

The activated charcoal is organic coconut, the luffa is also organic. I find luffa soaps interesting. Luffa comes from the inside of a zucchini looking gourd.  Once it dries its very stiff and scratchy.  When it's wet it is soft and exfoliating.  It also magically disappears ar you use the soap.  The first time I made luffa soap I thought the soap would get used up and you'd end up with an empty luffa. I never see it going anywhere, it just disappears. 

The Spoil Me Soap series is up at Joy's Handcrafted Soaps.  Whatever your skin type it might be a great addition to your routine to keep your skin fresh, clean and conditioned!

Saturday, January 2, 2021

Viking Soap Series

My daughter's beau asked if I could make a Viking soap series and I thought it was kind of a cool idea!  Between Matt, my daughter Loren and myself, we came up with three soaps. 

We discussed scents mainly but their ideas started my brain moving into ingredients that may have been available to Vikings, or in some cases because they sound like they'd fit the soap.

One of the scents Matt suggested was Sandalwood but it can be a bit pricey. He also suggested birch. I purchased birch and definitely love the scent but it reminded me of the Beechnut Gum we used to get back in the day. The scent is really pleasant and I will use it for soap but it wasn't meshing with the Viking theme for me.  I went ahead and splurged on Sandalwood essential oil and I'm so glad I did! I love it!

The first soap I made for this series is Viking Sea Salt Sunset Soap. This is a salt soap and I wouldn't recommend it to folks with sensitive skin, though I used fine salt it is still exfoliating. (UPDATE: I've been using this soap for about a week and have not noticed anything but a very light exfoliating feel on occasion. It's not harsh at all!) Apparently salt soaps are often used in spas, never been so I wouldn't know from personal experience. 


The Viking Sea Salt Sunset Soap has Baikal clay that gives it a lovely blue-green color. It's from Russia and is used for a gentle exfoliant, detox, and some use it as an anti-aging mask. I can't make claims that it will make you wrinkle free, but it's pretty. 

The soap has Australian sea salt, oils, shea butter and a high percentage of coconut oil. Normally I try to keep the percentage of coconut oil under 25% in my soaps because it's so cleansing it has a tendency to clean the oils right off your skin and makes your skin feel dry. But, salt has a tendency to remove any lather/bubbly properties from soap and coconut oil makes for lots of bubbly, creamy lather. To keep the soap from making your skin feel dry the soap has 20% superfats, well above the 7-9% normal superfats. Another point, salt soaps are moisturizing and hydrating.  Weird, huh? I honestly though it would be drying.

I also added sea buckthorn oil to this soap...from Siberia...for the bit of orange sunset color in the soap. I have to say this oil has such a lovely scent and is a beautiful orange! I don't think the scent carried through the saponification process but the Sandalwood smells amazing. On top, I sprinkled a tiny bit of Birch smoked sea salt from Iceland (it smells amazing and the rest of the jar is going into the kitchen). The smoky scent has disappeared but it was definitely worth sprinkling it on the soap. It should wash off the first time the bar is used.

The next soap in this series was Viking Spiced Mead Soap. First let me say, it's not easy finding mead and I definitely wasn't prepared for the cost. But I did find it and cooked it down to get rid of the carbonation and as much alcohol as possible. 


Because mead is made from honey I wanted the soap to have a honey color and I used the sea buckthorn oil to achieve that. The soap also has flax oil and beef tallow...the Vikings could (possibly, maybe) have used these to make soap...if they made soap. 

The Viking Spiced Mead Soap is lightly scented with clove essential oil and also comes with a Hammer of Thor attached to the raffia on the bar. It was the symbol of the Viking god of thunder. 

The last bar in this series is Viking Shield Maiden Soap. We tried to find information on what things may have been important to Viking women. Not an easy task. I know that nalbinding (it predates knitting and it's a form of making garments with wool and a needle made from bone or antlers) was a Viking thing. This is something I tried to do years ago and loved it. But it doesn't lend itself to soapmaking. Instead I went a more natural ingredients route. 


The Viking Shield Maiden soap has yarrow flower, elderflower and mullein teas instead of plain water. Goat's milk, beef tallow, flax seed oil, evening primrose oil, and rose absolute essential oil. I was aiming for a floral scent and when I read about the areas the Vikings inhabited there were a lot of flowers from the rose family, so I went for rose.  

The colors I chose represent the seashore that may have been visited by Vikings. Light sand, blue seas and pink wildflowers. Each bar will come with a rune bead that can be worn in your hair, a guy's beard, used to make jewelry or whatever you want to do to show your inner Viking!

The Viking soap series will be available at Joy's Handcrafted Soaps in February!

Saturday, December 5, 2020

TTRPG Soap Series

I've been working on a soap series for over a month, I'm very excited about it because it blends two things I am passionate about. Soap making and Dungeons and Dragons (table top role playing game...TTRPG). 

At the moment my son, daughter-in-law and occasionally two of my grandsons are at the end of our first campaign that we started over a year ago. My daughter and granddaughter were also playing but they've moved out of state.

The ideas for this soap series revolves around D&D because that's the only TTRPG I've played, but I can't use their name since it's trademarked so TTRPG it is. 

These soaps involve some new techniques and ingredients so it's been educational as well. On to the soaps...

TTRPG Tavern Mead Soap. Player characters in any TTRPG need to meet somehow. Or maybe they already know each other. However, many parties meet for the first time in a tavern. It's a place where people congregate so, why not? Maybe a fight breaks out and the strangers ban together to help. Or maybe a stranger shows up looking to hire a few people to help with goblins who have been attacking his farm and stealing his chickens. Somehow the players will ban together and form a party.

The TTRPG Tavern Mead Soap has ale, which gives great lather to soaps. My son Tyler gave me the mead idea, I knew I wanted the soap to represent an old tavern wood floor but my idea didn't go any further and his suggestion was very helpful! The soap has honey because that's what mead is made from. I looked at various mead flavors and ingredients, juniper berry seemed pretty popular. So juniper berry essential oil is the scent for this soap. 


I used the wood grain soap pour and was extremely happy with the results, especially since it was my first time trying it. In order to have a bar with a long enough piece to see the wood grain, the cutting of the soap is a bit different. Because of that, the outside side of the bar needs to be planed...which is fitting since its a wood grain bar. 

On with the story. The players decide they want to ban together to form a party to work together for the greater good and to earn gold. Somehow they find out that there is trouble brewing in a cave in a nearby mountain range so they prepare themselves for their first adventure and begin to make their way towards the mountains on a cold evening just as it is twilight and the stars are coming out. 


The TTRPG Mountain Terrain Soap represents a mountain range at dusk, with stars appearing in the sky. The soap is scented with Ho Wood essential oil. Its a bit difficult to describe the scent, its light, slightly like licorice...real licorice root, not candy licorice...slightly floral and a bit sweet. I sprinkled some tiny biodegradable glitter on the very top.

Whenever a party treks through the wilderness there is usually some type of encounter. A raiding band of goblins, stirges, wolves...inevitably something is going to attack. The third soap is TTRPG Roll for Attack Soap. Whether you're swinging a blade or casting a spell you first need to roll a d20 (20 sided dice) to see if your attack actually hits before you roll for damage. 


This soap represents that nighttime battle with damage being dealt. And each comes with a d20 imbedded on top that I purchased from Easy Roller Dice (no affiliation). The essential oils in this soap are lemongrass and peppermint. Both are great for waking you up and giving you energy, something necessary for every battle!

The last soap in the series is TTRPG Who's Got Healz Soap. Parties may not always have a healer, or maybe someone ran out of spell slots and can't heal. Every adventurer needs to carry a healing potion in their inventory because somebody is going to get hurt. 


This soap comes with a tiny healing potion that will be attached to the label. There are also two "d4" melt and pour imbeds in the soap they also have biodegradable glitter inside...because everyone needs glittery d4's...and d4's are used for rolling the amount of healing done. One clear, glittery d4 imbed is in the black and blue part (think bumps and bruises) and one in the white half. Scented with tea tree and eucalyptus essential oils, both known for helping with skin issues, it's both a woodsy and fresh scent.

Here's a shot of the clear imbeds with a light shining through...


So that's the TTRPG Soap Series! It will be listed at Joy's Handcrafted Soaps at the beginning of January 2020. 

My next Soap Series is in the planning stages and I can't wait to start on it!


Saturday Morning Cartoons Soap

I love this soap, it smells great, has awesome beneficial oils and cocoa butter and it was fun to put together!

The essential oil used is litsea cubeba. I've never purchased it before and though I had read that it was citrus-ee I wasn't sure what to expect. When I opened it I was pleasantly surprised to find that it smelled like fruity cereal. I knew immediately it was going to be a soap that had something to do with cereal.

The scent took me back to my childhood Saturday mornings and watching cartoons before there were channels dedicated to them.

Once everything was planned I made four very small batches of soap in green, red, orange, and yellow (kind of) with natural colorants.


I then cut the small slabs of soap into tiny pieces and rolled them into pebble-shaped...pebbles. This is actually a thing, when soap is at a certain moldable consistency it can be used as soap dough...kind of like kids Play-Doh. It took a wee while and after three episodes of The Curse of Oak Island, that was done. I let them dry out a bit before starting the milk portion of the soap.


I have this thing where my brain doesn't understand spatial relationships or sizes, it's how I ended up with a 20-quart stainless steel bowl that I can't use and the worlds largest roll of biodegradable bubble wrap (that might be a slight exaggeration). I ended up making twice as much pebble soap than I needed. I poured the pebbles into my soap mold just to check, way too many. After some quick recalculations I continued on and hoped it would look how I had planned it once it was sliced. It did!


The Saturday Morning Cartoons Soap is in the shop at Joy's Handcrafted Soap!


Sunday, October 18, 2020

Priority Shipping...

I thought I should explain why I ship Priority USPS. It isn't the cheapest way to go, that's for sure. 


To send a package First Class with one bar of soap it would cost the buyer around $3.50 (I'd love to offer free shipping but it's just not feasible). Most people purchase more than one bar at a time, postage goes up as the weight goes up. It only takes a bar or two more to reach Priority prices.

I can get up to 8 bars of soap, possibly more depending on the size of the bars, in a flat rate envelope. There are boxes called Scotty Stuffers that are made to fit inside one of these envelopes, just had to order more. I get the flat rate price with a bit of protection for the soap.

Priority is better for timing. I work compacted work weeks, 12-hour days, 3 days on 4 days off, then 4 days on 3 days off. When I receive orders on the days I work I can print Priority labels and get the package ready when I get home. The package is picked up by the postal worker the very next day. Shipping quickly is very important to me. Priority labels are the only labels I can print at the moment. 

Priority is faster by a few days.

I can get free Priority boxes and envelopes from the Post Office, they deliver them to me for free, too. Anything I can save is reflected in my soap prices.

Sometime soon, maybe at the beginning of next year, I plan on signing up at an online postage printing site. For the most part I would still ship Priority but if it's cheaper for my customers I will be able to print First Class postage.

So there you have it. I want to offer the best service possible to my customers and to get orders on their way quickly, Priority shipping is my only option at the moment. 


Saturday, October 17, 2020

Who do You Tube?

There are only three things I watch on YouTube. Soap makers, to get inspired to make soap,  Dungeons and Dragons terrain videos to get ideas for...building D&D terrain, and a few streaming D&D games to get Dungeon Master tips...which includes watching Critical Role.

Everyone has their likes and dislikes of the various YouTube shows, stars, genres, etc. I'm going to share some of my favorite soap makers with you...not in any particular order. A lot of people find it relaxing to watch the soap making and cutting process, some of us find it inspiring.

Not affiliated with anyone below...well...we're all soap makers so we're kindred spirits.

Katie Carson at Royalty Soaps. Katie is the epitome of quirky. She's funny, lively and extremely artistic. Her soaps are colorful and fun and each month she releases several batches that reflect a theme. Recently the theme was Disney Villians. She also does a secret soap series where she makes a different soap each week for several weeks and gives hints. Viewers can guess in the video comments and the secret is revealed with the last soap in the series. Katie also has a great tutorial on how to make soap (including this one on using lye) and she uses two recipes, one is basic and less expensive, the other takes it up a notch or two.

Clyde Yoshida at Vibrant Soap. Clyde's gift with color is amazing and it reflects the fact that he's an artist. He's actually well known in soap maker circles for the Clyde Slide soaping technique where you mix several colors of batter and alternating the colors, gently pouring them down the side of a large bowl in layers. Then pour that into your mold. The results are very thin, colorful layers. Beautiful!

Tierra Hayes at Gypsyfae Creations. Tierra does some pretty creative fandom soaps! She's done a Golden Snitch soap as well as the various House soaps from Harry Potter. There were also Star Wars fandom soaps. She makes gorgeous seasonal and cupcake soaps! 

Billie at Hippie Mumma Artisan Soap. Billie is an organic dairy farmer and soaper in Victoria, Australia. She uses the organic milk from her farm in her soap and her soaps all look amazing. She's great at making beautiful bars. I also love that you hear the occasional rooster crow when watching her videos!

Keeley at Soy and Shea. Another Australian soap maker, Keeley is fun to watch and isn't afraid to share videos where things go wrong. Usually it's a battle with a fragrance oil that moves the batter too quickly. But, she always manages to get a beautiful bar of soap no matter how stubborn the fragrance oils are and she does it while keeping her sense of humor. It helps other soapers learn how to deal with these types of issues. She, like others in this list, make gemstone soaps and sharing geological interests in such things I find her discussions on the gemstones very interesting. 

Lastly, but definitely not least, Valerie Mosher at Shalebrook Handcrafted Soap. Valerie is a soap maker in Canada and she uses some of the most unique ingredients I've seen of any soap maker. Many of which I'd like to eventually incorporate into some special soaps for my shop! Sea buckthorn oil, a variety of teas and milks. Things that are great for your skin! I believe the majority of her soaps are hot process and most, if not all have maple syrup. 

There are many more amazing soap makers out there! If you've ever thought about making your own soap to create something good for your skin it can be as cheap or expensive as you want to make it. My first soap was shortening, water and lye. And it was pretty awesome. Coconut oil can be inexpensive at places like Big Lots and 100% coconut oil soap can be one of the best soaps for your skin! Do your research, use a lye calculator to make sure your soap isn't lye heavy and I highly recommend Katie Carson's Royal Creative Academy videos. With a few inexpensive tools you can make soap for your family and friends!

Friday, October 16, 2020

Changes...

No affiliation with any of the links below...except the ones that take you to my soap shop.

It has been too long since I blogged, I guess I don't feel the need to write about everything I think in my head. Do y'all have that thing where your thoughts bounce around like a ball in a pinball machine, too? 

I've been making some changes in the ol' soap business, mainly converting all my recipes from hot process to cold process. I'm finding I like the resulting bars much better. Still a bit rustic, though!

Another change I've made is the beveling of edges on my bars. My granddaughter pointed out that they were too sharp at first. I still don't plane them so there will still be cut marks or drag marks from botanicals on or in the soap. I will use all of the shreds from the corners that I've been saving for a confetti soap sometime in the future.

I also purchased a "joyssoaps" stamp from ThreeDGeek over on Etsy. I'm really happy with the quality, it's exactly what I was wanting! 

I'm wrapping a wee bit differently... 


So, here's the thing about that, soap continues to evaporate off water after it's cured. If I label the soaps once they had finished curing after 4-6 weeks, the soap would still shrink up a bit and the labels would slip off. Before the change, I basically had to label everything when I got an order. Hopefully this new way of wrapping, with a dab of glue to affix the label to the raffia, will allow me to have things ready for orders. My next option is wrapping the soap in biodegradable cellophane bags. 

In addition to all of that I've been making imbeds with organic melt and pour... 

Sunshine imbeds!

It's quite a bit of fun to find cute things to add to the bars. It's slightly challenging getting natural colorants to disperse well but the imbeds are looking pretty cute!

This was a harder change to make. Titanium dioxide. It drives me cray not to be able to make white soap. Titanium dioxide is used in practically everything white, medical creams, sunscreens, ointments, toothpaste, makeup...soap. Does that mean it's safe, or maybe used too much? I really can't answer that.

But, I've spent some time looking into this and found a titanium dioxide that is 99.5% TiO2. It's non-Nano, Food Grade, nonGMO...and vegan. I'll probably only use it in soaps that require a white-white, which not many of my soaps do.

I'll be shifting some things in my shop, some soaps will be discontinued and placed in the Sale Bin. If you've not tried handmade/handcrafted soap this would be the time to check it out. I've talked with a lot of people about handmade soaps, and not necessarily mine, I have never heard a single complaint about handmade soap being worse than store-bought. Always the opposite, it really is worth a try. 

One change that should hit my shop in the first two weeks of November (I can't believe it's almost November!), Andee's Facial Spa Soap is shrinking from a rectangle to a heart. After talking to my daughter about it, we thought a face soap bar didn't need to be as large as a body soap bar. It's still the same recipe, just a bit smaller and it will also be less expensive. This is the most expensive bar in my shop and one that goes pretty quick so being able to drop the price and make more bars is pretty exciting!

I hope everyone is staying safe, and to steal a quote from Critical Role's Matt Mercer, "Don't forget to love each other."

Thursday, May 7, 2020

Learned something new today but I'm not sure what...

I've been planning a line of coconut oil soap for a wee while now. Coconut oil soap is probably the most lathery soap I've used. It's also very moisturizing. I've made hot processed coconut oil soap, there are still a few bars in my shop, but I am trying to switch back to making cold process soap.

I prepared my base recipe that I'll be using (coconut oil, coconut milk, essential oil, lye, water) and ran the numbers through SoapCalc to get the proper amounts of water and lye.

I removed four ounces of coconut oil and halved it, two ounces would have alkanet root as a colorant, the two were left plain.

I melted the coconut oil then added the coconut milk, blended it well.

I made the lye solution with the lye and water.

When the lye solution and oil were in the 80-85 degree F, I blended it to emulsion, added the lavender essential oil then blended together to almost a medium trace. I split the batter in half and added the alkanet oil to one half and the plain oil to the other half and stirred them each well.

I decided to try an "in the pot swirl" and poured the lavender batter into four different spots into the plain batter, gave it a quick stir and poured it into the mold, giving it some swirls on the top.

Looking kinda pretty!
I check the temp of my soaps frequently to watch for anything unusual...


Definitely starting to heat up...it's been about 5 minutes since it was poured. As soon as I put the thermometer down and turned back to my soap I saw this...


I stood there while watching it crack before my very eyes...


I watched as the gelling soap from the inside started pushing up through the crack. I was really worried about it causing a volcano and spewing right out of the mold so I placed the mold in a pan.

The temps reached 140F, honestly not extremely hot for a soap that's going through the gel phase, but what was an issue is that it did that all within 15-20 minutes. The top was already setting up (coconut oil makes a hard bar of soap) and when the inside started gelling it expanded and cracked the top.

I'm not exactly sure why all of this took place, maybe the lye reacting with the sugars in the coconut milk and heating up? Maybe I should skip the coconut milk in the other batches of my coconut oil soap?

I will have to do some research before I make more. I'm anxious to see what the soap will look like on the inside. Will the swirls still be there? Will the color change a bit...or drastically? Will I be able to cut it since coconut oil soap bars are hard and I have to let it cool and solidify from the gel phase? Will I end up with one big uncuttable hunk of soap? We'll see...

Monday, December 16, 2019

Why handmade soap...

Have you ever had to cook something and gotten oils or even shortening on you hands then noticed how soft you're hands felt afterwards? Me too.

That is one of the benefits of handmade soap. Soapmakers build their recipes around moisturizing the skin, cleansing and sometimes exfoliating. Many soap makers go beyond that by decorating their soaps into some beautiful bars. I watch several on YouTube that I admire a great deal, but that's another post for another day.

In order to make soap moisturizing it's necessary to superfat your recipes. If you weren't to superfat every oil/butter molecule in your recipe would saponify into soap with no extras to linger behind for the moisturizing properties we like. I have a Castile For Real bar that isn't superfatted and made with olive oil. It's great for making laundry detergent because there is no extra oils that will get into your clothes. It could also be used for people with extra oily skin.

The percentage of superfatting isn't as tricky as it sounds because so many people have made soap that there are some general rules of thumb. Most soapers start recipes at no less than 5% extra oils and adjust from there. I generally soap at 7-9% depending on the recipe. If you superfat too high, it results in a soft bar of soap that will turn to mush when used.

So handmade soaps are generally more moisturizing to your skin.

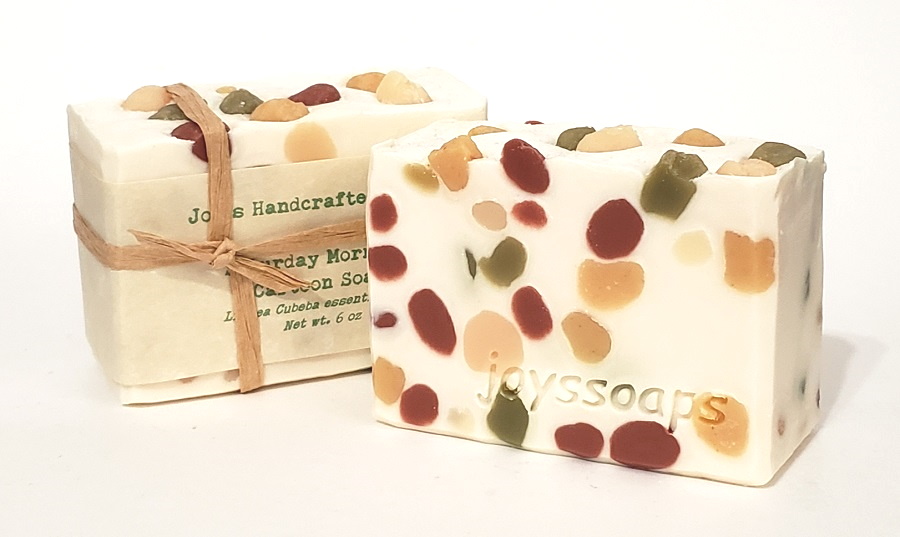
Why else is handmade soap great? Depending on the soap maker, there's not extra crud added. Some people add micas and fragrance oils to their soaps, I don't consider them crud. When you do this you can pretty much know what your soap is going to consistently look and smell like. There are some beautiful bars of soap out there!

Other soapmakers stick to natural ingredients, and while everything pretty much comes from nature, some things are altered by humans. Changed chemically, mixed with other things that have little resemblance to what they were in nature, then don't tell you exactly what it is. This.

If I can't make an informed decision on what I'm adding to my soaps, how can I list the ingredients for people who may have allergies?

I don't purchase certain brands of essential oils for this same reason. One of the things that first grabbed my attention here was when I was looking for vanilla essential oil. I don't think it would be financially sound for a company to sell (what they say is) 100% vanilla essential oil for $13 for a 4 ounce bottle. Any reputable company will tell you that it is blended with another oil and tell you what that oil is (in my case it's coconut oil and it will be listed as such in my ingredients).

If I can't tell my customers each ingredient, I wouldn't feel right about putting it in my soap. It's the same with colorant. Micas are beautiful and add gorgeous colors to soap but not knowing exactly what is in the mica, I can't list those ingredients in my soap.

In all honesty I've never heard of anyone having a reaction to micas and most people learn through trial error which fragrance and essential oils they are allergic to. There are a multitude of people who will react in a multitude of ways to a multitude of things so for me, personally,  I'd rather keep things simple.

I hope that doesn't sound like I'm complaining about soapmakers who use these things because I'm not. Just trying to explain why I choose to keep my soaps simple.

The best thing to me about handmade soaps, isn't so much about the things I leave out, but rather, the things I put in. Oils and butters have so many beneficial properties as do essential oils (even though we're not allowed to say that).

I've had people tell me if they have to use store bought soap after using my soap their skin gets dry to the point that it's itchy. I've had others tell me they no longer have dry, scaly skin. And even a few claim that using my soap got rid of rashes that were still there after taking prescriptions. I will never claim my soap fixes or cures anything. I think its possibly a blend of things that's left out of my soap that may be in store bought soaps. Dyes, perfumes, preservatives that maybe their bodies reacted to without them knowing what the exact problem is.

It does my heart good to hear such things though because that's what it's all about for soapmakers. People who find something that feels good on their skin. Something they love and gives them great results.

I highly advise that everyone try handmade soap, even if it isn't mine. Our skin is our largest organ so it's just as important to care for it as it is the insides of our bodies.

Thursday, December 12, 2019

Imperfect soap...

Sometimes I have to kind of laugh when I look at the soap images on my shop page. I see all of the little imperfections on my soap bars. Marks from knife cuts, finger smudges from handling the bars while moving the bars to drying racks, not so perfect edges or corners, some soda ash. I think there's a couple of coffee ground drag marks on the Gma's Jittery Mocha Latte Soap picture.

I do have a device that cleans up the bars, it bevels the corners and smooths the flat surfaces. My Dad built it for me and it works great! The thing about doing that is it can take off quite a bit of soap. I would either have to sell smaller bars or make the bars bigger to account for any trimming. Then I have to do something with the trimmings because I'm not going to just toss them.

It's possible to rebatch the trimmings by melting them in a crock pot to make bars for personal use. I have three lunch bags full of these plus 16 bars of rebatched soap at the moment.

As much as I would like my soaps to look perfect, I made the call to stop trimming them. Once the soap is used, all of the imperfections disappear. It's like magic...or something. It's soap. I realize people may want perfect when they buy something but the thing most important to me is how the soap treats skin. How it is made with only natural/organic/nonGMO oils, butters, scents, botanicals and colorants. The finished bars have no harsh chemicals (yes, I use lye but it's no longer in the soap once the soap has cured, it's science), no unpronounceable ingredients (though I do have trouble saying Ylang Ylang and for years I pronounced Calendula CalenDULa).

Minor imperfections are...well...rather minor when it comes to something that's going to disappear as soon as it's used. I really think the amazing properties of my soaps speak for themselves...if they could speak.

Whipped body butter

Loren and I decided to try making whipped body butter last week, it's been something I've been thinking about quite a bit.

I work in a clean room environment which means I have to wear gloves for at least three hours a day. I don't know about you but my hands sweat when I wear gloves like that. Not sure what they're made from, I do know they're latex free. On top of that, my skin doesn't seem to like the soap dispenser soap I use all day at work, either.

My skin was getting so dry at work that it was starting to crack. I've been using lotion bars that I made (oils/butters/beeswax) but the moisturizing quality was very short-lived.

I looked into other things that might do the trick and stumbled across whipped body butter. The recipe I came up with was formulated by what I already had on hand. As a soapmaker I had quite a few options and went to my notes on the beneficial properties of each oil and the percentages that would be best for a leave on product.

Shea butter makes up 50% of the end results. Now, to be quite honest shea butter is not my favorite smell. I can't pinpoint what it is but sometimes when I smell it I am fine with it, other times not so much. And I'm talking about the same brand and package.

Anyway, making a small test batch we needed to use a hand mixer, which can take up to 30 minutes to whip the oils into a solid butter (halfway through the process my Mom informed me that the mixer had a stand, that was a very handy contraption).

We ended up with an amazing product, nothing but oils, butters and a tiny bit of arrowroot powder to keep the body butter from being sticky. Have to say I'm really loving this! I used it daily at work and my hands are back to normal! The slight greasy feel disappears almost immediately as does the shea butter scent. There are no added colors or scents, I may leave it like that. Just pure and natural moisture for dry skin!

I'm having it tested by my volunteers...and I'm sending some samples in soap orders as well. Hopefully we've come up with a recipe that others will love as much as we do!

Thursday, November 14, 2019

Going cold...

When I first started making soap I used the cold process method. After mixing the oils and lye solution you pour the soap into a mold of some sort and wait for four or more weeks before you can use the soap. Saponification doesn't usually take quite that long but you want to be sure there is no live lye in your soap and you want to give the bars a chance to harden.

With hot process soap you basically cook the soap batter either by heating it in a crockpot until it volcanoes and goes through applesauce, mashed potato and Vaseline stages, or by soaping at high temperatures (in the 200F area) in a stainless steel pot/plastic container, all of the stages happen pretty quick when soaping that hot. It's pretty fun to watch this all take place within a half hour.

There are a few advantages to the hot process method. First, it's fast, once the cook is over, saponification has taken place and you can use the soap immediately. Usually you give it a few weeks to evaporate some of the moisture and give the bar a chance to harden. Another advantage is you're able to add the superfats to the soap after saponification so you can add the really good fats then, giving you the chance to control which awesome oils aren't eaten up by the lye. It's good practice to use the more pricey oils at this point. It can also help to add essential oils after the cook so they're not superheating and loosing their oomph.

There are a couple of disadvantages to the hot process method as well...at least for me. One is, the soap batter is pretty thick and while it's possible for some soapers to get some amazing swirls, it's not as easy to get the pretty bars that you get with the cold process method...at least for me. Another disadvantage is that there can be quite a bit of stirring of the hot batter which is like stirring a mix between brownie batter and cookie dough.

Due to the job I have, my hands and wrists already take a beating and stirring a thick batter gets extremely painful. Over the summer I've been working on cold process soaps because it's not as hot as working over very hot soap batters. Making the cold process soaps made me realize how much easier it was on my hands and wrists and I'm thinking I may have to go back to that method.

One concern I have is not having the ability to choose which oils/fats will superfat my soaps. I'm not even sure it will be noticeable. I'm going to give it a try and see if there is any difference in the properties of the soaps. Quality, moisturizing soaps is my number one goal. I'll do what works best to achieve that!

Wednesday, November 13, 2019

Christmas Soaps

A few months ago I started thinking about various soaps to make for my shop that represent the upcoming Holidays. There are still some bars of the Autumn Pumpkin Soap available for now but I wanted some soap for Christmas as well. Making organic/natural soaps can make that a little bit tricky.

It's been difficult to find a natural colorant that makes soap a Christmas red so I passed on that pretty quick. And many of the scents we associate with Christmas (cinnamon,  nutmeg, clove) can only be used in very minute amounts because they are "hot" oils that can be irritating to skin.

I asked for input on Facebook and received some great suggestions!

I ended up with three different soaps, Gingerbread Soap, Eggnog Soap and Christmas Tree Soap. I used the bare minimum of essential oils but like any new skin care item I really...highly...recommend you use these only on your hands and wrists at first to make sure you have no issues with the essential oils. And as always, check the ingredients lists to make sure you have no allergies to anything in the soap.

Gingerbread Soap

The Gingerbread Soap has some pretty awesome moisturizing oil: avocado, castor, coconut, shea butter, etc. It also has a bit of annatto seed oil and cacao powder for color, maca powder and apricot seeds for a bit of exfoliant, ginger essential oil and a bit of ground nutmeg sprinkled on top (didn't think ginger would show up very well). I love the little orange speckles and it smells so good! The bars are a bit shorter but they are also wider. You can see that it went through a partial gel, there's a darker oval that reaches almost to the edges of the soap.

Eggnog Soap

I love Eggnog, so rich and creamy and...noggy. Pretty amazing oils in this soap, too! I added a tiny bit of turmeric to the bottom to give it a creamy color and left the top plain for a bit of whipped cream. It also has nutmeg sprinkled on top, bentonite clay and nutmeg essential oil. It smells amazing!

Christmas Tree Soap

I love the way this soap smells! It has fir needle and cedarwood essential oils and it smells very Christmas tree-like! Spirulina powder was used to add color for this "tiger stripe" swirl. Still getting the hang of those swirls. 

All of my Christmas soaps will be listed in my shop on December 1st and there is a very limited quantity available!

Thursday, October 3, 2019

Gma's Jittery Mocha Latte soap...

I started making this soap because so many people love coffee and coffee has great benefits for the skin. The first batch I made had coffee as part of the water in the lye solution and coffee grounds as an exfoliant.

Current Gma's Jittery Mocha Latte soap...

It is a pretty great soap with castor, coconut, grapeseed, olive, sweet almond and avocado oils, as well as cocoa butter. It also has yogurt and heavy whipping cream. I really wanted this soap to smell like coffee and I have searched for a roasted coffee essential oil for months.

During that search I started reading about the benefits of coffee bean oil (not essential oil) and there are a lot of them. I'm one of those people who kind of take miracle cures/fixes with a grain of salt even though I've had tremendous luck with essential oils for so many different things.

Some of the claims that coffee bean oil proponents promote include...
  • Reduces acne
  • Diminishes cellulite
  • Soothes insect bites/stings
  • Soothes puffy eyes
  • Acts as an antioxidant and fights free radicals 
  • Reduces fine lines/wrinkles

I definitely felt like it was worth the investment to add this to Gma's Jittery Mocha Latte Soap. To make recipes for soap I use a soap calculator (SoapCalc) that lets you...well, calculate soap ingredients. Most importantly, it calculates the safe amount of lye to use in your batch.

When I want to see the properties of a specific oil, I just add that one oil to get an idea of what it does for soap on it's own. So here are the results of coffee bean oil...


I mainly pay attention to the top 5 "Soap Bar Quality" numbers and I can see that coffee bean oil adds hardness to the bar, is conditioning and provides a creamy, rather than bubbly, lather. So it seems like a good addition to soap because SoapCalc is going by the oils properties (fatty acid chains and stuff), not by what the internet says about coffee bean oil. You can see that it has no cleansing properties in and of itself, however if you're using it to wash your hands your hands will still get clean...because you're washing them. In comparison, check out what happens if a bit of coconut oil is added...


It becomes a much harder bar, it has great cleansing qualities and now it has some bubbles. But, the conditioning and creamy qualities go down. Ahhhhhhh! I can spend hours working on recipes to get the best possible properties I can. So why does this happen? No idea. Obviously coconut oil has different fatty acid chains and they may react to water molecules in a whole 'nuther way.

Anyway, what was I talking about? Coffee soap! So I made more Gma's Jittery Mocha Latte Soap yesterday and added roasted coffee bean oil and coffee essential (I wasn't sure if the coffee bean oil scent would stay through the curing process). I just have to say that both of these smelled amazing! I was pretty excited about making a coffee soap that smells like coffee.

So the batch was mixed and I split a tiny bit of the batter off. To the larger portion I added organic cacao powder...it is a mocha latte, afterall. I left the smaller portion as it was and poured...

Textured the top with a spoon and sprinkled ground organic coffee and organic cane sugar on top.

Now I just clean the kitchen and start waiting to see if it gels...

The soap did gel, the hottest temperature reading was 114 degrees F.

And this morning it was ready to slice...

You can see the lighter drop swirl at the top of the bars.

This soap should darken a bit, at least the part with the cacao powder, it's a bit hard to see but there is a darker rim around the sides and bottom of the soap. This "discoloration" is part of the curing process. I was a little perplexed by the fact that the coffee grounds look like they're encased in air bubbles, I try pretty hard to eliminate air bubbles in the soap before and after the pour.

The biggest issue I have at the moment is that...I smell very little coffee. I didn't necessarily want it to be a hit-you-in-the-face coffee scent but I didn't want it to be a I-think-I-smell-coffee-but-it-might-be-my-imagination scent either. I'm hoping when the "new soap smell" wears off, the coffee scent will shine through. If not, at least it will have real coffee, coffee grounds and coffee bean oil. That's about as coffee as I can make it and it will be listed in my shop at the end of October.

If you can't wait until then to grab a bar of Gma's Jittery Mocha Latte Soap, there are a few bars of the original version left in the shop.

Wednesday, October 2, 2019

Re-using plastic grocery bags...

A few posts ago I joked about how back in the day crocheted hats were the thing to make with saved up plastic grocery bags. I'm not exactly sure how it started but the thought of repurposing plastic bags was kind of new then.

When stores started using plastic bags instead of paper bags it was like, yayeeeee, we're saving trees! Well, we all know how that turned out. I've never been a fan of plastic bags, sure, they have handles but sometimes they're just plain useless. You often have to do the double bag thing so then you're stuck with one more bag to dispose of.

Anyway, after that last post I decided to see what other things people were making with plastic bags. Some are actually kind of cool. I'm not affiliated with any of the links, or any links, (my family does claim me sometimes, though).

I searched the webs for plarn crochet projects (plarn is basically plastic yarn), there were tons to choose from. There's also knitting and weaving projects as well.  

If you have an overabundance of plastic bags and are looking for something crafty to do you might check out a video or two on how to cut the bags. It might seem like a no brainer, cutting bags into strips, but there are a few secrets to it that allows you to cut the bag into one long strip so you're tying fewer strips together. 


I wasn't able to find the owner of these cushions but if you can crochet you will most likely be able to find a pattern for a ball and scale it up a wee bit.


Had to include the hat!

Thursday, September 26, 2019

Concert time!

Last week my daughter and I went to see Breaking Benjamin, Chevelle, Three Days Grace, Dorothy and Diamante. Loren bought the tickets as my birthday gift!

Chevelle is one of my favorite bands and she and I have seen them together twice before...back in the day...a lifetime ago.


I admit I wasn't very familiar with anyone else's music but I've listened to Breaking Benjamin since Loren got the tickets in February. 

The concert was at the Ak Chin Pavilion in Phoenix. We've never been there before and to be honest, I rarely go to Phoenix...it's big...and not being familiar with it, slightly confusing. 

We decided to leave with plenty of time to get some t-shirts and a beverage before we found our seats and since we were mainly there to see Chevelle and Breaking Benjamin we didn't feel the need to be there when the gates opened so we hoped to avoid that rush.

So not being in a rush was a good thing because they had I-10 West closed for construction. It turns out, I-10 West is the highway we needed to get to the concert. Luckily we have map apps that can feed us that info before we get in the car. Not so lucky, sometimes the map apps seem to find weird ways to get you where you're going, but it did get us there.

We decided to splurge a bit and paid for reserved parking. Not being familiar with Ak Chin Pavilion, we had no idea what the parking was like or how far away we'd be or how long it would take to get to the gate. It was a good choice, we parked right outside the gate!

Ak Chin Pavilion is definitely set up well for big concerts and on top of that they do it well. Plenty of security and police officers, the vendors were efficient and speedy so even the long merch line moved quickly. And the bathrooms were clean, yeah, that's a thing.

While we were in the merch line getting our shirts we caught the last bit of Dorothy, she sounded pretty cool, though I'm not very familiar with her music.

Setting up for Chevelle
We got to our seats just before Three Days Grace started so we made ourselves comfy and waited.
Not going into a detail but the show was pretty amazing!

Chevelle

Big screen pics!

I love those guys!

Breaking Benjamin

Loren enjoying the show.
One of my favorite music moments is when Breaking Benjamin did a medley of covers, Pantera, Nirvana, Metallica and Rage Against the Machine. Metallica is one of my all-time favorite bands and I told my daughter that's probably as close as I'll ever get to seeing them live.

I will try to see Breaking Benjamin and Chevelle anytime I get a chance. And to be able to have that time with my daughter was priceless!

Wednesday, September 11, 2019

Sweet Erica's Honey, Oats and Goat Soap

I absolutely love this soap. Milk soaps have pretty amazing qualities and have been used for centuries as a luxurious soap. Goats milk soap has a distinctive scent, its a lovely rustic scent that reminds you there's milk in the soap. It's quite lovely and I don't know if it's my imagination but I smell the oatmeal as well!

Milk soaps contain lactic acid which is a gentle exfoliant, it helps remove dead skin cells (who knew!) and goat's milk (and other milks) contains vitamin A which is helpful in moisturizing and maintaining healthy skin.

I love the orange bars of the Sweet Erica's Honey, Oats and Goat Soap but I wanted them to be more representative of the oatmeal color of the very first oatmeal soap I made. Its such a lovely, creamy color and the oatmeal has been blended to a powder so it's not too scratchy. I love seeing the speckles of oatmeal in the bars.

So I went old school with this batch and used the cold process method (it seems to be a bit nicer to do in the summer). I was very fortunate to have my son, Tyler, here to help I definitely needed the extra pair of hands! 

Mixing lye into milk sometimes takes an extra step, it's not always necessary, it's more of an aesthetics thing. To keep the milk from turning a dark orange when adding the lye you can freeze the milk first. Freezing keeps it from overheating (and possibly scorching) when you start adding the lye. Then you add the lye to the milk ice cubes a tablespoon or so at a time and stir...a lot. The frozen milk starts to melt pretty quick and you just keep slowly adding the lye and stirring...a lot...until all the lye has been added and the milk cubes melted. Then you stir...a lot. 

It's interesting to note that the lye and the fats in the goat's milk are already starting to saponify in tiny amounts during this process and tiny beads of soap start forming. The goal with all of the stirring is to make sure all of the lye has been dissolved. I always pour my lye solution through a strainer and the little tiny beads of forming soap made that a bit more difficult than usual but it eventually happened.

Fresh in the mold...love that color!

The soap smells as good as it looks! 

Oatmeal speckles!

When I mixed the lye/milk solution into the oils the lye solution was at 78 and the oils at 85. Nice cool temps for making milk soap. The soap did gel slightly and heat up to 118, surprisingly cool. But when I cut into them...


I had a slight moment of panic. I thought the soap had the...dun dun duuuunnnnn...dreaded orange spots (DOS, and yes...as silly as it sounds, it's a thing). I've heard of it but I've never had a soap with DOS...that I can remember. I did some searching, the pictures of DOS look nothing like this and the reasons behind DOS don't apply to my soaps. So if it's not dreaded orange spots, what is it?

Okay, so here's the story. When I warmed up the oils, honey and shea butter enough to melt the shea the temps were higher than my lye/goats milk solution. I was hoping to get the soap in the mold so I stuck the pot of warm oils in an ice water bath in the sink to bring the temperatures down. If you remember the name of this soap "Sweet Erica's Honey, Oats and Goat Soap...yup, that's honey. When I placed the pot of oils and honey in the ice water bath the honey solidified from the cold. I noticed it towards the end of the pour but forgot about it until I saw the spots. I think in my head (it's crazy in there sometimes) I thought the soap would superheat (milk soaps often do) and the honey would melt/blend with the soap batter as it heated.

So now you'll get the lovely properties of honey directly on your skin and since it's in soap it washes right off. Win-win, right? Well, we'll see. The soap will be perfectly safe to use and unless something crazy happens before it's finished curing, should just be soap with a few bits of honey here and there. It should be listed in my shop in mid-October.

Moral of the story? Wait until the oils and lye solution are emulsified before adding the honey.

Saturday, September 7, 2019

Autumn Pumpkin Soap

I've been debating on making some sort of soap for the upcoming autumn season for several months. I had to stop debating and make a decision this week because I knew I'd be making a cold process soap if I was making an autumn soap and adding food stuffs (like pureed pumpkin) and it will take at least four weeks for cold process to cure before I can list it in my shop.

Once that was decided I started looking into the benefits of adding pumpkin puree to soap. Pumpkin has a lot of healthful benefits like vitamin C which is great for the skin. Vitamin C helps protect skin from free radicals that cause wrinkles and other skin issues. Pumpkin also has carotenoids that are antioxidants which can help improve skin texture. It contains potassium, copper, zinc, manganese and other minerals.

Now, mind you, these are only a few of the great benefits of pumpkin, and that's when it's eaten. How much of this transfers to topical use, and after going through saponification when making soap? Honestly? No idea. However, pumpkin is used for facial masks and creams for a healthy, bright complexion so maybe it will be a beneficial addition to soap.

To me, the coolest thing about using the pumpkin is...well, it's pumpkin. It's a natural ingredient and the tiny bits of pumpkin will gently exfoliate. It's also a sign of autumn, my favorite time of year!

When I started blending everything together the oils were at 88 degrees F and the lye solution was at 93. I wanted them cooler but I was getting impatient. Between the sugars in the pumpkin and heavy cream and lye reacting to each other and the palm oil (RSPO (Roundtable on Sustainable Palm Oil) Mass Balance) the batter came to a thick trace pretty quickly. It was quite pudding-like when I poured it into the mold.

Fresh in the mold Autumn Pumpkin Soap. Smells so good!
It was my goal to add autumnal scented essential oils, like cinnamon. Cinnamon is such a strong scent but once I started researching I decided I didn't want to add it to this soap. Cinnamon can be a major irritant for people that can cause skin issues and possibly breathing issues.

The clove oil, which can be a slight irritant, has been added in an amount that is below the suggested safe amount by IFRA (International Fragrance Association). I've also added ginger, vanilla and orange essential oils. Warm and spicy, it smells pretty autumn-ee! In hopes of there being a bit of orange color to the soap I also added a few ounces of annatto seed oil. (Keep in mind that essential oil scents are pretty fragile so you shouldn't have to worry about smelling pumpkin pie-ish after using it.)

Superheated up to 145 degrees F pretty fast, a few minor cracks on the surface.
Once I poured the soap batter into the mold it went into gel stage and heated up very quickly. It doesn't matter how many times I make soap, I still find the whole process so fascinating!

Freshly cut and going on to the curing rack for at least 4 weeks.
I'm really hoping that as the soap cures it turns the color that you see on top and the side edges of the bars. Time will tell...

Before I list any new soaps in the shop I test them myself and give some out to family members, I feel like they're pretty honest with their feedback! The soaps will be listed in the shop in mid-October if the cure is done curing.